Difference between revisions of "Tomb Raider III Story"
MilkFloat6 (talk | contribs) (→Killing Tony) |
MilkFloat6 (talk | contribs) (→Killing Tony) |
||
| Line 354: | Line 354: | ||
| colspan="5" align="left"| | | colspan="5" align="left"| | ||
|- bgcolor="#F2F2F2" | |- bgcolor="#F2F2F2" | ||
| − | | 04 || '''Caves of Kaliya''' || '''15''' || Cobras, Tony (Boss) || 0 || Maze, Deadly Fire | + | | 04 || '''Caves of Kaliya''' || '''15''' || Cobras, Tony (Boss) || 0 || Maze, Deadly Fire affected Water || Infada Stone, Grenade Launcher |
|- | |- | ||
| colspan="5" align="left"| | | colspan="5" align="left"| | ||
Revision as of 20:25, 17 August 2008
|
Editing Notice This article will develop over a large period of time, and until the base layer of it (a full plot) is completed, I urge anyone not to edit or change it in any way. |
Contents
Introduction
The following article will explain in high detail the story-line of the 1998 Tomb Raider III. This page, though, does not include high-detail walkthrough information of each level, that can be found in the tombraidergirl pages, but instead the cutscenes and FMV's seen throughout the game. Also, this article will suggest ideas on tackling certain obstacles or enemies, so it can generally be placed between a walkthrough and a game synopsis story.
A lot has happened since Tomb Raider II. Lara Croft is becoming more and more realistic, in the sense that she now can perform new moves that people would expect from her, such as sprinting, or crouching.
Newer sounds in the game also improve the overall reality. The guns shots actually sound like guns shots now, and Lara makes different footstep noises for the different surfaces she walks on.
For the first time in the series, the usual linear gameplay of Tomb Raider is now nonlinear; After the four India Levels, Lara can choose which of the next three locations she wants to go to, and for every location, Lara has a new, and interesting outfit.
However, on a more critic tense, Tomb Raider III introduces Code Disks, laser-activated turret guns, carefully bypassing dangerous energy beams, and navigating through a derelict subway. The problem? Tomb Raider has now practically lost all of its original Tombs which made the first installment so famous and successful. As Lara, at a certain level, is traversing over the city of London to find a particular artifact, it might as well be called City Raider.
These modern locations were removed in the next game in the series; The Last Revelation, which was designed as a resurrection of the original Tomb Raider.
Level Map
The following diagrams and captions will show the levels in the game. Nevada, London and the South Pacific can be played in any order. At the end of the third location of the non-linear section of the game, Lara goes to Antarctica for the climax of Tomb Raider III. Selecting a level will take you to the paragraph section on this article.
India- 1 - Jungle
- 2 - Temple Ruins
- 3 - River Ganges
- 4 - Caves of Kaliya
- 1 - Nevada Desert
- 2 - High Security Compound
- 3 - Area 51
- 1 - Coastal Village
- 2 - Crash Site
- 3 - Madubu Gorge
- 4 - Temple of Puna
- 1 - Thames Wharf
- 2 - Aldwych
- 3 - Lud's Gate
- 4 - City
- 1 - Antarctica
- 2 - RX-Tech Mines
- 3 - Lost City of Tinnos
- 4 - Meteorite Cavern (Main Boss Level)
Bonus Level
|
Bonus Level: All Hallows If the player collects at least 59 out of the total 60 secrets in the game (Note - secrets are irregularly numbered in each level), then they can access the secret bonus level after the Meteorite Cavern level. Completing this level successfully will allow the player to play the game again with unlimited ammo, unlike the previous game, when simply finishing the game once can grant this option. All Hallows was meant to be set between Thames Wharf and Aldwych. It is set in St Pauls Cathedral, perhaps explaining the useless Cathedral Key found as a secret at the end of Thames Wharf, and that she was on the roof of this cathedral at the end of that particular level. It is also explains the unlikelihood that an entrance to a derelict subway lies beneath a church bell tower. |
Prelude
The following paragraphs and sections of information will introduce the story of Tomb Raider III through artifacts and the opening FMV sequence.
Artifacts
Tomb Raider III is about collecting four meteoric artifacts from across the planet. The individual object has it's own unique power, but when all four are combined in the Meteorite Cavern deep below Antarctica, they have the power to rapidly accelerate human evolution. Each artifact, no matter what it's individual power, can mutate an living being to a certain extent, but for pure evolution, all four must be collected and put in their respective places in the Meteorite Cavern. The Artifact name, image, power (if known), owner and location are shown below:
| width="250" Template:Descline | Artifact | width="200" Template:Descline | Image | width="250" Template:Descline | Power | width="250" Template:Descline | Location | width="250" Template:Descline | Owner |
|---|---|---|---|---|
|
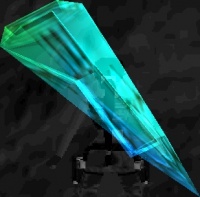
Infada Stone |
If a person stabs the Infada Stone into their heart (similar to the Dagger of Xian), they then get the power of levitation and to fire beams of compressed atmospherical energy. |
Originally inside a Indian Temple. |
Worshipped by Infada Tribes, and later stolen by Tony. | |
|
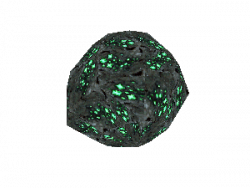
Element 115 |
Unknown power |
Inside an alien UFO, in Area 51, Nevada. |
It is owned by the US Government. | |
|
The Eye of Isis |
Can stop the bearer from aging, and, similar to the Infada Stone, get the power of compressed atmospherical energy and to expel it in deadly, super-charged blasts. |
Sophia Leigh's Office, London |
Sophia Leigh | |
|
Ora Dagger |
The Ora Dagger allows the controller to summon monsters and beasts, and to manipulate and controls electro-particles in the air, and fire them in a deadly blast of lightning, and also use them defensively, as in an electro-shield. |
A South Pacific Island |
A cannibalistic tribe and their leader, the Puna |
Additional Information:
|
Ora Dagger and Element 115 Mix-Up An important note is that the Ora Dagger and Element 115 were mixed up during the creation of the game, so in some games, when you complete Nevada, you'll get the Ora Dagger then, and the Element 115 at the end of the South Pacific (though this is just the name; whatever game type the look of the artifact will be the same). |
It was revealed in Tomb Raider III: Lost Artifact, the multi-level expansion of Tomb Raider III, that there was a fifth artifact; The Hand of Rathmore. It powers in the Meteorite Cavern are unknown, so perhaps only four are required for the evolution process. The individual powers of this artifact are also unknown.
Story
The following account is completely from the opening sequence.
The Meteorite
Millions of years ago, after the time of dinosaurs, but before the time of humans, a meteorite survived the high density plunge into Earth's atmosphere. It was around the size of a large car, but may of been larger before the atmosphere descent, which would of burned it down to a smaller size. As the introduction clip shows, the animal inhabitants of a tropical area, actually an Antarctica island, millions of years ago, sensed the meteor coming and were immediately alarmed. A few minutes later, the meteor crashed into a bed of trees, exploding everything around it. Over the next few millions of years, this island area of tropical Antarctica became inhabited by Polynesians, early humans. There, they discovered the meteor, and the strange, unnatural powers that it possessed. The Polynesians worshiped this rock, and sculpted four objects of different shape and power from it; the Four Meteoric Artifacts.
As revealed in a clip in the South Pacific Islands section, the inhabitants of these islands fled when one of the natives was born without a face, due to the over-exposure to the meteorite artifacts, similar to the effects of radiation. This naturally shocked the other tribesmen, and so they fled what they now were calling a 'cursed island'. The left the four meteoric artifacts inside a meteorite chamber beneath the Antarctica islands' surface.
It is here, when all four artifacts are combined, that any living thing can be radically evolved.
Present Day (1998)
The mining company RX-Tech, founded by Dr. Mark Willard, set out a mining and drilling excavation in Antarctica to try to find a rumored Meteorite Cavern, which Willard found evidence of in a diary of one of the sailors on the HMS Beagle (he showed this diary to Lara at the end of the India section). Currently, one section of the group is drilling into the ice in order to discover anything. Willard is seen speaking to someone on a phone, though the recipient cannot understand him (whether this was because of his deep scottish accent or a low signal, it is unknown). At this time, the drill bit becomes lodged into some rock (this could be meteoric). The drill breaks, just as a snowmobiler drives up, asking Dr Willard to come to Site 2 (another excavation area). Upon the short journey, Willard asks "Find any more meteorite?". The reply from the snowmobiler is "Little younger than that". When they arrive at Site 2, we see a carved polynesian head, like the ones seen on Easter Island, followed by a camera zoom that shows many more embedded into the snow. Willard then approaches a small depression in the ice. Below it is a small wooden block, bearing the name of one of the crew of the HMS Beagle. The inscription on it reads Paul Caulfield, 1812 to 1834. Willard says "This place has a busy history...".India
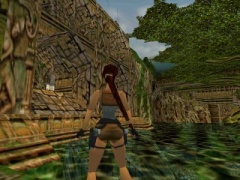
Lara, has somehow heard of the mysterious Infada Artifact shortly after completing her search for the Dagger of Xian, possibly from the rumours spread among the Infada Tribes around Calcutta, India. At this point, Lara does not know that the Infada artifact is one of a set of four meteoric items. In this section of the game (and the only section) Lara is wearing the Standard Outfit. There is only one human enemy, and that's at the very end. Indian instrument based music is heard occasionally, and a new tropical wildlife background music can be also heard in most of the levels. The rather unncerving background music heard commonly in Tomb Raider I and II has been replaced by a newer remake of this musical background.
India is mainly straight-forward, although does have a small bug located in the Temple Ruins level. Enemies are usually easy to kill (with the large exception of Shiva Statues) and the levels are reasonbly easy.
Note: In India you will enocunter Cobras which will attempt to poison Lara by biting her. If they bite you, you must use a small medi pack (or an equivalent Power-up crystal if you are playing the game on PC) to heal the wound. If this poison bite is ignored, displayed by a yellow flashing health bar that will slowly decrease, than Lara will gradually die.
Jungle
Lara begins Tomb Raider III upon a massive sloped hill in the higher regions of dense Indian rainforest, presently unsure where the rumoured temple, which houses the artifact, is located. The Shotgun is also secretly hidden in this high area, below a small thicket of rainforest leaves, on a flat section of land at the top of the slope. As you inevitably slide down, if you jump onto the fallen tree trunk spanning the width of the slope, you'll meet a rather harmless monkey. In this level only, the monkeys encountered are harmless, unless you shoot them; then they become aggressive (though their attacks don't cause much damage). Sometimes you may have to kill them, because they may of taken some important item that is essential or needed, and will not give it back. They can also be helpful, leading you to helpful places where you can find an item, or switch, or past traps.
The Main aim of this level is to locate the Indra Key and use it to open the door to the temple. After sliding down this huge slope at the beginning of the level, Lara must make her way around a forest courtyard, before using a Zipline to access a deep forest area. In this vicinity, Lara re-meets Tigers (they are only present in this level). They are generally as easy to kill as they were in Tomb Raider II.
Similarly to the Tomb Raider II starting level, The Great Wall, this particular level focuses on getting the player familiar with the controls in a more dangerous environment than the Polaroid, and to put them against several traps (though the number of traps and obstacles in this level is no where near the number in The Great Wall).
Towards the end of this reasonably easy level, the player has to flood a large outdoor rock chamber to access a switch behind a waterfall which opens an underwater door in the same relative area. Beyond this door is an underwater channel leading to a small room with a ladder (in this room is a tiger). At the top of the ladder lies the Indra Key, but you must claim it quickly before a monkey drops down from the treetops and takes it (if he does take it, you have to kill him to get it). After disposing of another tiger appears on the lower ledge with the Indra Key receptacle (the tiger appears upon claiming the key), the key has to be inserted into the lock. This raises the nearby metal grating, accessing the level exit through some swamp (a main adversary in this part of the India section).
Meeting Tony
The camera descends upon a small campsite just below the area of swampland. Communication equipment is set up, along with tents with lanterns at the front. We hear the portable satellite device crackle into sound as someone tries to contact the people here. Dr Willard is heard on the receiving end, shouting "Tony man, I know you're there!"
Suddenly, we hear a man shout "woohoo!" from somewhere in the vicinity. Lara asks to the area as a whole "Hello? Hello?". A blonde man is seen staggering out of one of the tents shouting "What!? What do you want from me now!?". Lara, a little startled, replies by commenting "Nothing that taxing..." She then asks if he's all right, because of the absurdity of his previous comment.
"If you'll all stop, I might be just fine, just a hundred percent, just, augh!" He grasps his head during this sentence.
If you'll all stop? Who are you talking about? replied Lara, as she was the only other one there.
"All of you, hundreds of you, talking and chattering and breaking my brain up!"
It is then clear that this man, Tony, is suffering from Jungle Fever, and Lara questions his sanity by her reply to that rather mad statement; "Mhm... Well I'm not quite sure where you're coming from, but I just want to know about the Infada Artifact, in the Temple up there." The camera angles up to look at the entrance to the temple.
"Voodoo magic and all, huh? I don't touch the stuff myself" comments Tony. His absurd comments are now starting to annoy Lara.
"It's not voodoo, look, is there anyone else here?" asks Lara, as there is more than one tent in the area."
"Yeah, Randy and Rory..." At this point, Tony starts packing away the equipment around the campsite.
"Randy and Rory? Where? What are you all doing here?"
"Well, they're staying put, in that temple" he says, as he puts a sleeping bag into a metal crate. "I told them not too, I warned them first. Not doing much now I doubt... under half a ton of mudslide."
"Me?", he continues. "I'm leaving." He puts the green laptop and the satellite device into the crate. "Next bus out. This jungle has rooted enough rot into me. I'd offer the same advice to you, but you don't seem like the type to take it, to care if I said you're gonna die in there."
He laughs coldly as he moves up to the edge of the campsite, above a rock ledge, and actually leaving the crate behind. "Yeah, die..." He jumps off, laughter echoing in the distance.
Lara, despite what Tony said, walks calmly into the temple.
Temple Ruins
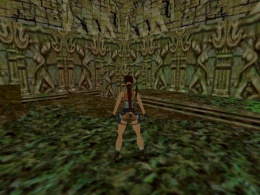
Temple Ruins is the lengthiest level of the India section, and focuses on collecting five Key's of Ganesha. This level also introduces huge Shiva Statues which are only seen in this particular level of the game. Shiva Statues are similar to the Xian of Tomb Raider II. They start out as stone ornaments, and indeed, some are just stone objects, but others come alive when Lara moves to a certain position. They are the first enemies in the Tomb Raider series so far to be able to protect themselves from gunfire. Alive Shiva Statues use their six swords (or Scimitars) to shield themselves from bullets. For this reason, it is best to use the Pistols instead of any other available gun because you might waste ammo on them when they're protected. To lower their swords and continue firing, you must either hang and drop (then pull up) from a ledge (if you're on one) or move around constantly around the floor, until he lowers his sword. You are safe even on a ledge four clicks high (or the size of a normal movable box), and the statues can't hit you from there. When they eventually succumb, they fall over and turn back into statues. Two of the several Shiva Statues will drop a Scimitar each, and these are to be placed upon a third inactive Shiva Statue to open a nearby door.Lara starts this level in a small riverside bank. In the area are two cobra and a switch, which accesses a tunnel below. In this tunnel, are two monkeys, which are now hostile to Lara (although they cause little damage). Lara first must ascend to the tree tops above where she began the level, by climbing up a huge mudslide. Then, she must maneuver past, over and through a waterfall and access the first section of the temple, which contains one inactive Shiva Statue. However, the adjoining chamber, accessed by crawling through a small tunnel, does have an alive Statue, which activates when Lara enters this room through the tunnel.
Fighting Shiva
Fighting Shiva can be easy when several elements are put into action, and one of these is taking advantage of the artificial intelligence that the Shiva Statues hold. First, you must decide upon which of the following two tactics you wish to act in fighting a Shiva.
- Fighting in the Field
- Ledge Protection
Fighting in the Field is for those confident in fighting these large giants. You do get better action, which is what mainly the series are about, with this method, but it puts you at more risk. Simply, you must run and jump in all directions to escape the Shiva's blade. When it lowers it's swords, shoot in the period he is susceptible (still jumping), and when he raises them again to protect himself, stop shooting. If you continue shooting, he will not lower his swords. Just jump away from him until you can hear him retracting his blades, and, depending on your position, then change direction to shoot. Repeat the overall method until he falls.
The Ledge Protection is for either first-timers or for those uncomfortable with fighting in the field. It can be much slower than the previous method, but definitely much safer. In any area where you fight a Shiva, there will be a ledge in which you can take cover on. Shiva cannot strike you even on lower blocks (minimum height is 4 clicks tall). Try to get onto a ledge as quickly as possible if a Shiva is coming to life, and once there, shoot until he protects himself. When he does, either hang and drop from the ledge and then immediately pull up or run and jump to another ledge if one's there. If the ledge in the room is too low for you to hang and drop, then you must fall back and then climb back on. Once you move, or pull up, the Shiva will lower its swords and you can fire once more until it protects itself again. Then repeat the process until it's dead.
Although, these are just suggestions. In any Tomb Raider, for any enemy, you should find your own way of dealing with them.
Deeper Temple
In the same room as the first alive Shiva, there is a large doorway requiring two Key's of Ganesha in order to open it. Opposite the door way is a ledge with two switches. One opens a door in the same area, and the other opens a trapdoor once again in the same room. At the bottom of the trapdoor is another switch that opens another door opposite the one that opened a minute ago. Beyond each door is one of the two Keys of Ganesha needed (beyond a series of traps, obviously). It doesn't matter which direction you head first.Right Gate
Through the right gate, the door closes behind you, and you must follow and area of swampland and mechanical blades traps (along with poisonous darts). At the end is a large room full of blocks and a main central structure. One block can be moved, so you can access a door on a higher tier, which opens when a switch is pulled on the floor area. Through the door is a drop off into a pool, and a tunnel ending in two parallel switches that opens a trapdoor in the ceiling in the tunnel. Up is an area with a pool, and an inactive Shiva Statue. The door near the ornamental statue opens when a switch is pulled (which can be reached from scaling invisible boxes over the pool. Inside this door is a long rectangular room, with a spike trap at the end. The spike trap starts when Lara pulls the switch, and she must run to the other side to claim the Key of Ganesha and then run back through the door before the spike trap blocks it (it closed when you entered the room, and re-opens when you claim the key). Outside, the pool has now turned to mud, and you must follow the passage and return to the first alive Shiva Statue room.Left Gate
Through the left gate you have to pass through a tunnel (with a dart trap) and then scale up and around a small valley, until getting to an area with a pit. Over the pit, several boxes need to be reconfigured in order to reach a switch, which floods a pool near where you came through the left gate (which has a water switch). You must then retrace you steps until reaching back at this shallow pool, and to pull the switch, and access the second Key of Ganesha (or first, depending which order you took the gates). Then return through the passage you came in (the left gate to return to the first alive shiva room.
Level Climax
When both keys are inserted, the doors open, and you have limited time to climb the ladder to the ledge before the spiked ceiling descends. In the room above is two monkeys and another block room with a central structure. One block can be moved so Lara can maneuver to pull two switches to open the door below. Beyond is a room with two alive Shiva Statues. The first one activates when you enter the room, and the second comes to life when you touch the ledge with a third, inactive Shiva Statue. In fact, this Shiva Statue, if you have paid particular attention to how the statues look, it is missing two swords, and this statue is a item receptacle. Each Shiva Statue will drop a scimitar when defeated. Place the Scimitars on the inactive statue to open the door to the final chamber.In the next chamber, Randy and Rory are seen horribly hovering in mid-air.
Another Shiva Statue present comes to life when you approach the third Key of Ganesha from below Randy (or Rory) on the high pedestal. To exit this area, and finish the level, you must find two other Keys of Ganesha. One is inside a room with another falling spiked ceiling. You must quickly pull two switches in this room before the ceiling descends, and then fall into the trapdoor which opened. Below is one Key of Ganesha. Claiming it opens the door in front of you and an access back to the main chamber.
The fifth, and final Key of Ganesha of this level is found in an underwater room in the blue adjacent room to the one with the floating Randy and Rory. However, a current stops you from claiming it, and it pulls you towards an underwater spiked wall. You must carefully maneuver yourself away from the wall and pull the two switches to remove the current. Now you can claim the key.
After placing all three keys into the three receptacles in that area, a door nearby opens, which leads to the level exit, and the next cutscene.
Shooting Tony
The next cutscene is activated upon entering the area past the opened door. Lara is seen sliding down a slope, exiting the temple.
As she reaches the bottom, she balances herself so she doesn't fall over the edge and into the river. She familiars herself with the environment, but suddenly takes a step back as she spots Tony standing on a raft in the middle of the River Ganges (So he hasn't abandoned the Jungle?). At first, he doesn't notice her; he seems to be more interested in the scrutiny of some aquamarine block embedded into his chest. Lara, knowing that this must be the Infada Artifact as the block hasn't killed him, realizes that Tony must of been one step ahead of her, despite what he had said about leaving the Jungle, and had already killed Randy and Rory, one of which had a wound as if something had been stabbed into it. Lara draws her Pistols and begins shooting at Tony on the raft. Tony, now obviously aware of her, just laughs at her retaliation and uses the powers of the Infada Artifact inside his chest to cause the entire temple to collapse. Lara quickly dodges the cylindrical columns of the Temple as they fall around her, finally dodging one last block when she thought it was over. When the camera regains Tony, he is laughing maniacally as he is lost from site around a corner. Lara, ready to battle, starts of running towards where Tony disappeared, but backtracks when she sees a green Quad Bike placed by a waterfall, most probably left by Tony. She runs to it, and that's where the cutscene ends, along with the level.
The River Ganges
This level focuses on using the Quad Bike to span certain gaps that would be impossible to cross with Lara alone. Most of the level focuses on this. If you're finding the controls difficult to master, especially if you are used to the different Tomb Raider II controls if you played that game before this one, you should most definitely practice on the Quad Bike at Lara's house.
By using the Handbrake Acceleration control (hold down the handbrake (the ? Key) while motionless then press the forward directional button for a few seconds before letting go) you should be able to pass over most gaps. Also, whilst in the vehicle, you can run over monkeys, who seem to stay still and not attack while you're on the Quad Bike. One last important note is that the Quad Bike will explode if you ride off a particularly high cliff to the area below, and it will also explode if you fall in the river, killing Lara instantly. In this level, you will get off the Quad Bike often.
If you fall into the main course of the river, you will not be able to surface, and you'll either drown or get devoured by the Piranhas in the water. If you survive the path of the long river to the end, it is a dead end, and a piranha infestation.
You will not be able to see Tony when you regain control of Lara after the cutscene. Using the Quad Bike you first must scale the many gaps that you must cross. As said before, this is what the level is mainly about about (an important note is that some gaps may have a ladder leading down to a Secret, so it's worth checking the sides of the put for a climbable surface).
Later on in the level, you will experience a very narrow path and a tight corner (or two) that must be carefully drove round, followed by a Vulture valley.
Vultures are easy enemies that can be seen from a distance, but usually come in packs of two or three. Their shadows are a clear giveaway, along with their incisive and annoying calls. They attack with their claws, but do not cause much health loss.
Towards the end of the level, you will leave the Quad Bike for the last time above a waterfall. At the bottom, you can see the raft Tony was on crashed and broken on the bank of the river. He rode the course of the Ganges and fell of the edge, crashing into the river. The powers of the Infada Stone may of saved him.
Behind the banks and waterfalls where Tony's raft was is a hidden tunnel, leading to the Caves of Kaliya.
Caves of Kaliya
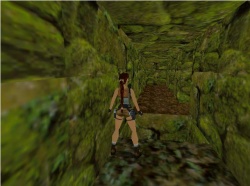
The Caves of Kaliya are generally a maze, but a very frustrating one. The maze section of this short level is divided into three levels; A higher, middle and lower. The middle level can be completely ignored, but more pick-ups are found when going through the middle section. Caves of Kaliya can often be frustrating, especially if you constantly find yourself in dead ends that look to familiar, or areas you been to before. A good walkthrough, such as the tombraidergirl [1] ones, are required if you find this level particularly hard.
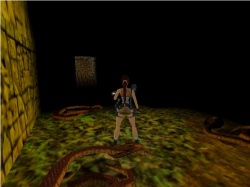
Throughout the maze you will find Cobras (the amount will depend on the route you take), but at the very end, you will experience a small cave full of eight cobras. It is best just to shoot them and ignore if you have got bitten. Wait to you have killed all eight before using a Small Medi Pack to stop the poison.
At the end of this chamber, follow the crawl-space until you can stand. It's time for the Indian boss; Tony.
Killing Tony
Tony has made his way to a great antechamber below the surface area. Now Lara must fight and kill him in order to claim the Infada Stone from his defeat.
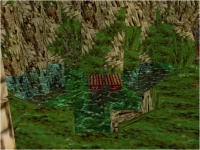
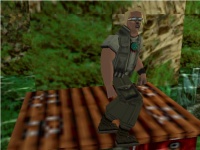
After collecting a save crystal, slide down the slope, pistols drawn. I do not advise using the Shotgun as it has a low effect on Tony from the safe distance you should be from him, and you'll just waste ammo. Besides, the Pistols are actually stronger in this circumstance.As soon as he's in view when you're sliding down the slope, start shooting. When you reach the bottom, he'll start levitating, and while he's doing that, sidestep twice to either the left or right so you have room to slide flip (still shoot). In a blast of Infada energy (Image 2) Tony will covert the the water between the four islands in the chamber into a deadly fire induced liquid, also making it shallower. Do not fall into the toxin. Tony will then start using the power of the Infada Stone to throw fireballs at you (Image 1). Because of this, side-flip left and right (make sure you have initially sidestepped twice, or you'll fall into the toxin while side-jumping) while dodging his blasts, still shooting.
He will fall surprisingly quickly, and his body will disintegrate into nothing after a second energy blast. The Infada Artifact will be left on his island after his demise.
Alternatively, instead of staying on one island, you can quickly move around the other three while shooting, though this may take longer.
Before picking up the Infada Artifact (which ends the level), you may want to pick up three pick ups elsewhere in he room (you would of noticed these if you jumped from island to island, but you couldn't stop and pick them up because Tony would fry Lara). They are a Small Medi Pack, some Grenades, and the Grenade Launcher left behind by Tony.
Now you can pick up the Infada Stone to end the level with a FMV Cut-Scene.
| Level No. | India Level | Number of Enemies (Maximum) | Types of Enemies | Number of Secrets | Types of Traps and Obstacles | Significant Finds |
|---|---|---|---|---|---|---|
| 01 | Jungle | 9* | Monkeys, Tigers, Piranhas (cannot be called) | 6 | Swamp, Rolling Boulders, Spikes and Spiked Walls | Indra Key, Shotgun |
| 02 | Temple Ruins | 31 | Monkeys, Shiva Statues, Piranhas (cannot be killed), Cobras | 4 | Swamp, Mechanical Blades, Poison Darts, Boulders, Spiked Walls, | 5 Key's of Ganesha |
| 03 | The River Ganges | 34 | Vultures, Monkeys, Piranhas (cannot be killed), Cobras | 5 | Quad Bike jumps, Current Affected Water | Quad Bike |
| 04 | Caves of Kaliya | 15 | Cobras, Tony (Boss) | 0 | Maze, Deadly Fire affected Water | Infada Stone, Grenade Launcher |
|
* (Not including the Monkeys) |
